Strips Presence for LoRaWAN
Meet the ultra-slim occupancy sensor for LoRaWAN
- Occupancy sensor
- Object detection sensor
- Ultra-thin (3mm/0.12in) design
- Up to 10 year battery lifetime
- Up to 10 km (6 miles) range
- Easy installation
Strips Presence model numbers:
- Strips Presence (EU): 13 03 001_19
- Strips Presence (North America): 13 03 002_19
Strips Presence for LoRaWAN is an innovative ultra-thin (3mm/0.117in) active IR occupancy sensor for smart offices and buildings. Strips Presence monitors the desk occupancy rate by measuring objects and people within close range (configurable up to 50cm/19in). It can be mounted invisibly or highly discreetly and is very suitable for office applications such as hot-desking and similar services.
The discreet design and easy mounting with adhesive backing make it the sensor of choice for architects and design-conscious office managers. Strips Presence can also be used for asset monitoring such as paintings and other valuables.

Strips Presence complemented with +Switch can be used as a slider button, for example, to order cleaning of a desk when needed. Strips Presence is part of the Strips LoRaWAN family of sensors that offer a range of up to 10 km (6 miles), battery life of up to 10 years, and a very simple process of mounting and inclusion.
The sensor works in Presence mode by emitting a short IR pulse every Poll Interval ("A" in the table below) seconds. It measures the amount of IR light reflected back. Should the amount change more than Threshold ("B" in the table below) several times within Timeout ("C" in the table below) seconds the sensor will report Presence = 1. After that, if no reflection changes are detected within Timeout (C) seconds, it will report Presence = 0. Timeout(C) should be more than twenty times longer than the Poll Interval (A) seconds for reliable operation.
In object detection mode the sensor will regularily emit a short low-powered IR pulse every Poll Interval ("A" in the table below) . It measures the amount of IR light reflected back. Should the amount of light reflected back exceed the set Threshold ("B" in the table below) it reports closeProximityAlarm = 1 (confirmed). Should the light reflected back be less than half the set Threshold value the sensor reports closeProximityAlarm = 0 (confirmed).
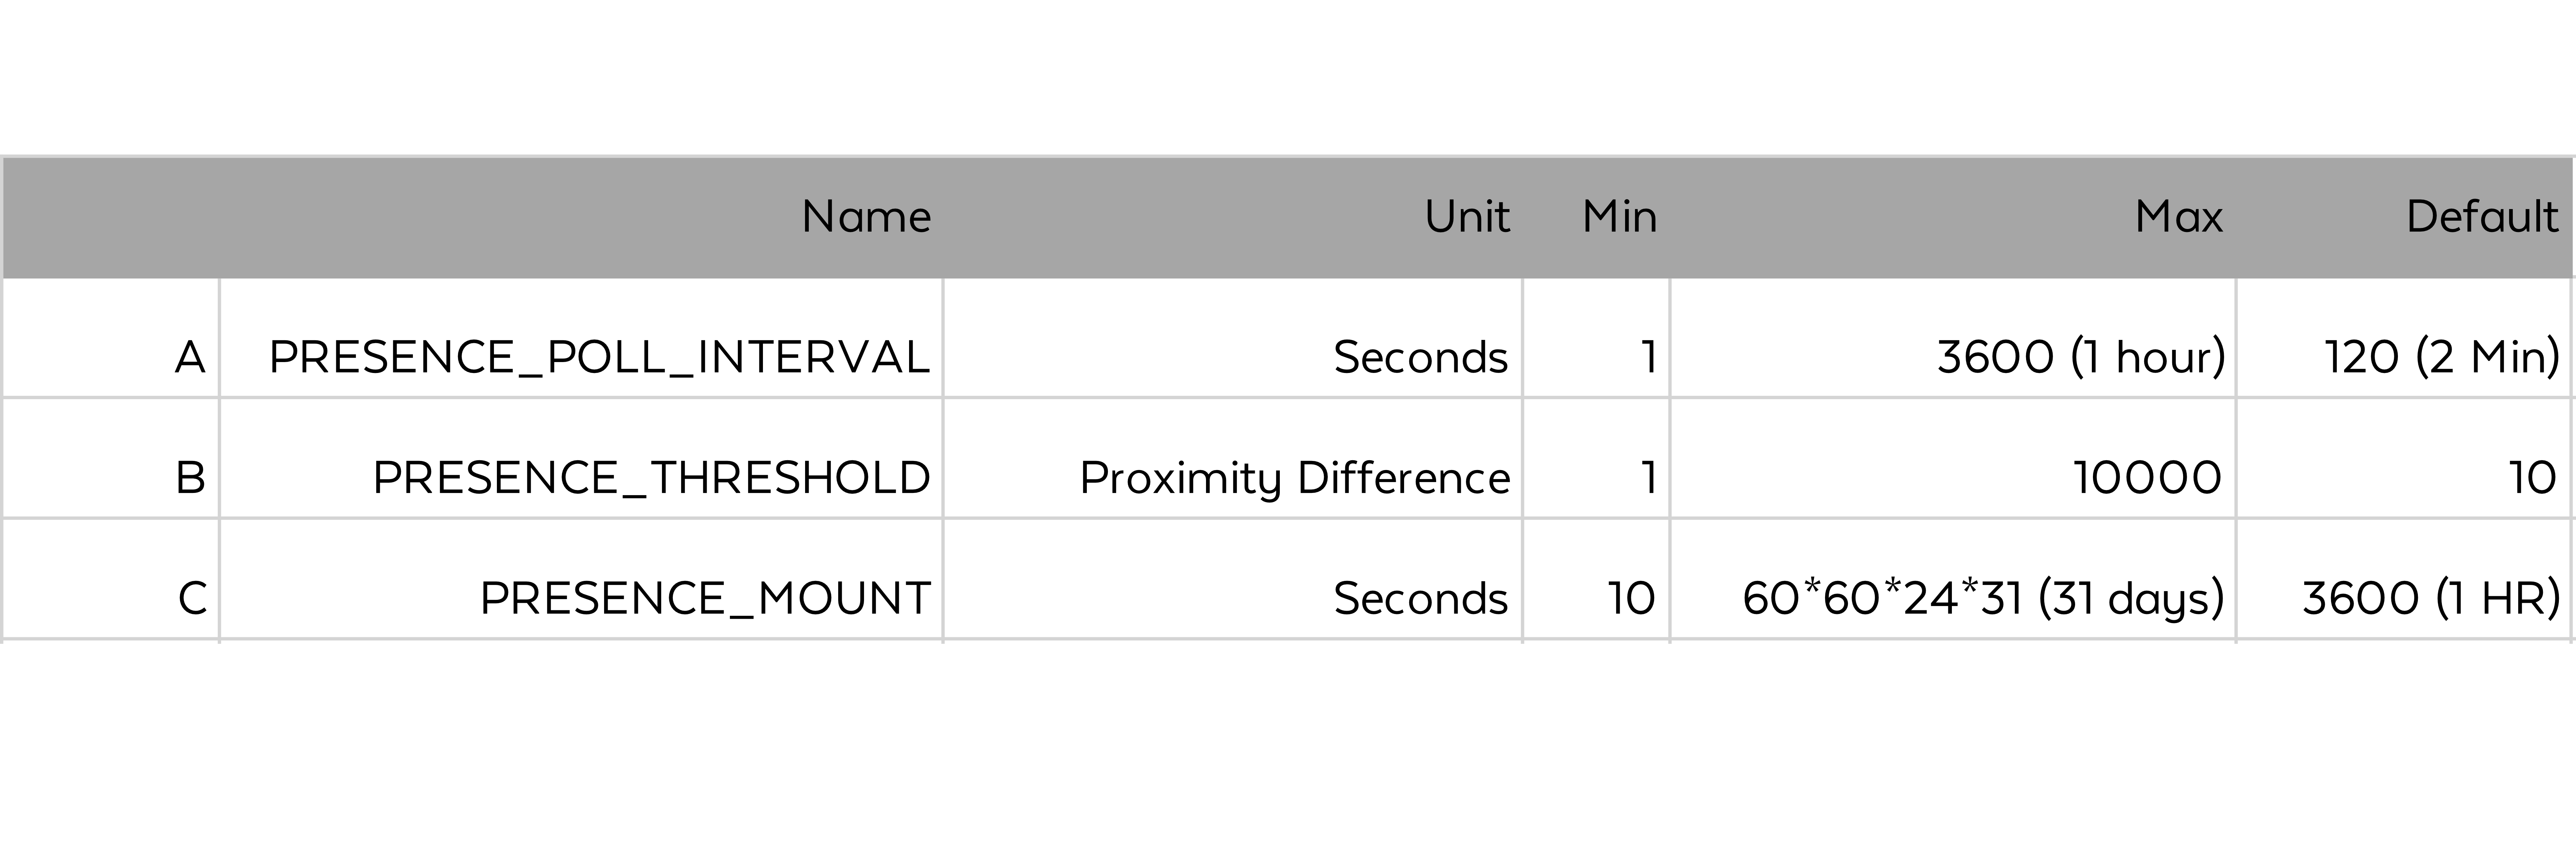
Note that setting short time intervals will not necessarily improve precision but it will use up the battery faster than with the default settings.
Joining Strips to your network
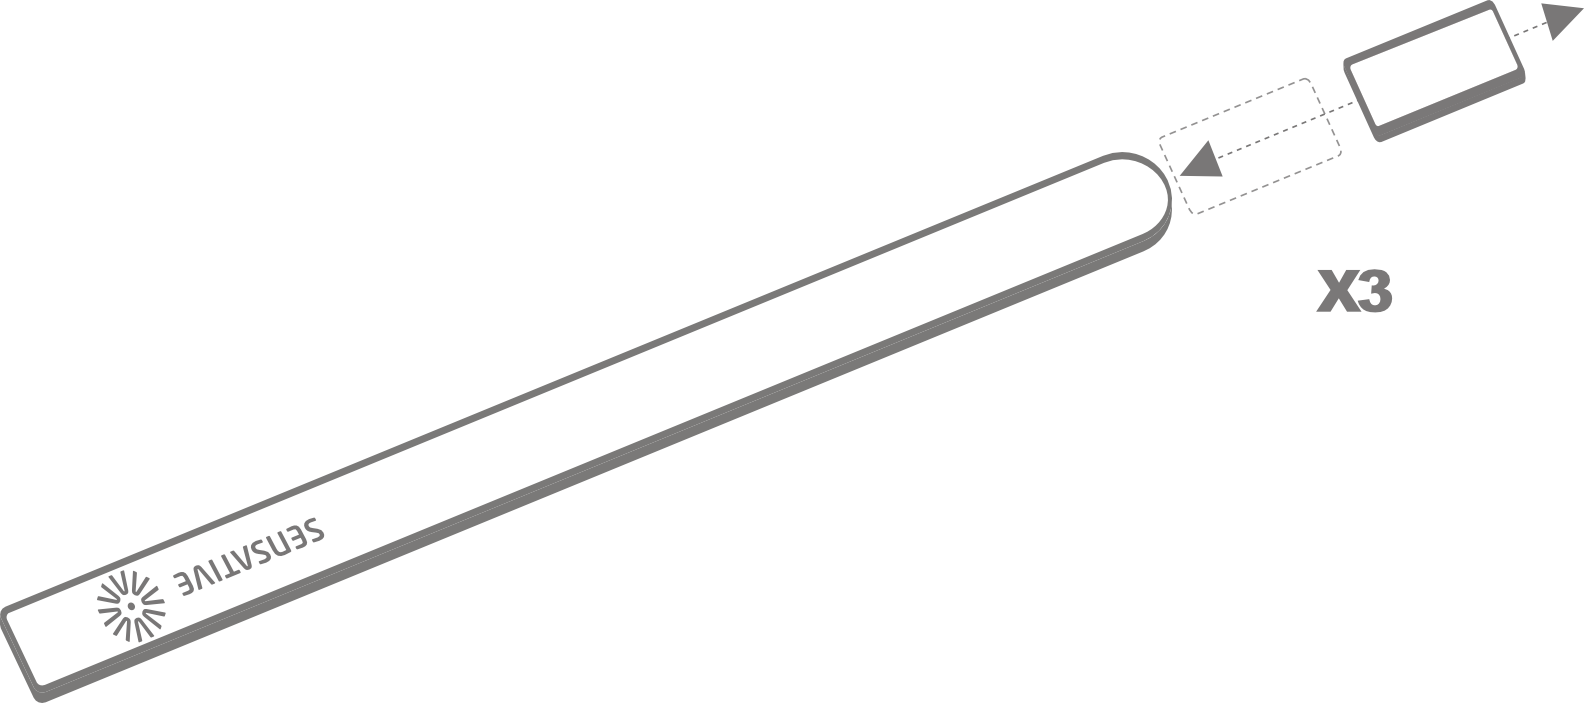
To join Strips Presence to your network, take the square magnet and touch it to the rounded edge 3 times, for 3 LED blinks.
Observe the LED - After a few seconds, one long green LED blink confirms the device has been successfully joined.
5 red blinks indicates the device has failed to join, contact support here.
Configuration Strips Presence
The sensor comes pre-configured with a basic profile that detects Presence. To choose other profiles for different use cases, visit our configuration tool here
Mounting
The recommended placement is affixed (using the included adhesive) to the underside of the desk, square end mounted about 1 inch (25mm) from the edge facing the person to be detected
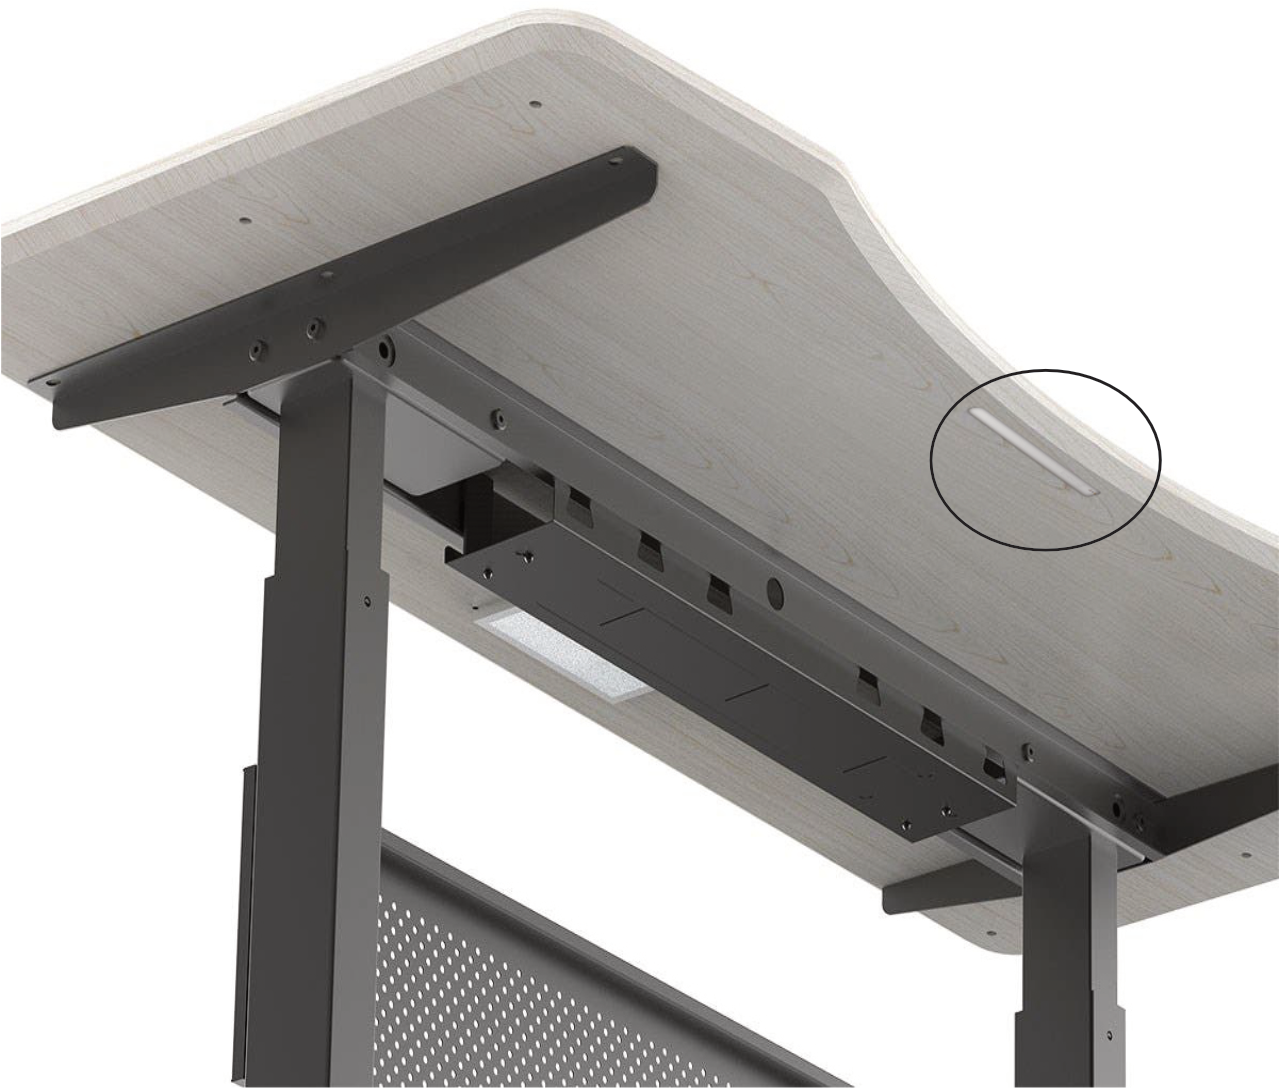
Depending on the construction of the table it can be mounted in parallel to the edge of the desk, or with the round end pointed to the center of the desk. Take note that its field of vision is not obstructed by the construction of the table

User commands
Sending an open frame
To send an open frame from the device, generally used in order to accept a down link payload (Type A device), take the square magnet and move it to the rounded edge 3 times, for the green LED blinks.
1 - short blink means that the frame was sent (success) 5 - red blinks means that there was no acknowledgment from the gateway
Factory Reset
To reset the device to the factory settings, move the magnet to the rounded edge 3 times, and on the 3rd pass hold the magnet for 10 seconds. Two long green LED blinks means reset was successful.
For more information and support visit: https://sensative.com/sensors/strips-lorawan-sensors/strips-presence-lorawan/
Or contact us here
Important Information
Do not re-pack Strips with magnets attached after adding them to your system or removing the magnets
Documentations - Links
Please find more documentation online: * Strips LoRaWAN resource center